D'Elete BC in NJ
Voyager  Dispensing gallons of useless information daily...
Posts: 1,671
|
Post by D'Elete BC in NJ on Nov 4, 2008 7:41:00 GMT -8
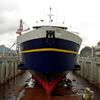
Discussions of what type of camera to buy, editing techniques, etc have cropped up many times on the forum, and I thought it would be good to have a dedicated place to ask questions, offer suggestions and discuss how to make your picture taking the most it can be. I'll start it off with a discussion that came up in WCK thread about his recent trip to the lower mainland. Very nice photos WCK. I like how they contrast well, the dark sky against the white ferry. What kind of camera/technique do you use?, your shots always seem to make the colour pop out. I can't speak for how much post picture taking processing WCK does and how much is scene composition, but a couple of tricks up my sleeve are to tweak the saturation up a bit, and sharpen the image ever so slightly. Tweaking the exposure down a little can effectively deepen colours too, though you can overdo the shadows if you move it down too far. Personally, I shoot everything in RAW format, do most of my editing in RAW and then convert it to JPEG. I like to work in Photoshop or GIMP, but for the time being much of my editing is done in the propriety software that came with my camera as I haven't found an importer for that works properly for Sony's .ARW RAW format files yet. I use the channel controls a lot to tweak the shadows and highlights on the brightness once I've got the overall brightness about right. My software has an in-picture threshold indicator so I can adjust pretty well for over and underexposed regions. I do miss the ability to mask certain areas, blend and some other miscellaneous tools Photoshop has, so once I'm done the bulk editing, I work on the jpeg with it. If you have the option of adding filters, a Sky 1A filter, or Haze 1 or 2A is good for some haze reduction (it's good to note...if you can see the haze, this filter isn't going to make a big difference; if you don't remember the haze and you see it in your pics, then this filter will have help) and to protect your lens. I also use a polarizing filter on all my lenses, especially for on-the-water shots as you can use it to remove unwanted reflections and add some contrast. I've tried warming filters too, but I can edit that type of effect into my pictures later, so I haven't been using them on my digital camera. I have also considered using contrast filters, but I need to investigate this a little more and ask a few questions before I spend the money on them. In the digital age, as it was back in the chemical age, editing and creativity can be done with the camera and/or in the 'dark room'. The dark room today is, of course, replaced by computer editing. The camera that I mostly use is a digital 10 MP SLR type Pentax K10D. I also own another Pentax DSLR 6 MP ist DL. The lens that I use most of the time is a Tamron 18 to 250 mm zoom (equivalent in 35 mm camera terms to 28 - 375 mm). All lenses are protected with a UV or skylight filter. In good sunny weather I usually use a polarizing filter. It is a highly recommended filter, but it will cost you about 2 or 3 'F-stops' (or EV's - exposure values). Mostly I under-expose photos by 1/3 or 2/3's of an F-stop. It is when I down load the photos to the computer that I really will start to 'play' with the images. I will alter colour, saturation and lighting. The software that I mainly use is ACD's Pro Photo Manager and its integrated photo editor. Some features that I use a lot are lightening shadows & darkening highlights, changing colour balance, removing digital noise, etc. All these same features can also be used with scanned versions of older slides and negatives. When my wide angle lens is not wide enough I will use a program called 'Auto Stitch' to seamlessly put photos together. check this link: www.cs.ubc.ca/~mbrown/autostitch/autostitch.html I will soon give you a before & after version of the same picture - one unedited and straight from the camera, and the second edited to my satisfaction. That will be in a few days... I've been playing with Windows Live Photo Gallery, and for quick and dirty panoramics, it is pretty functional...look under the 'Make' menu. Less control and functionality than the software WCK suggests, but simple to use. A brief description of my equipment...I recently acquired a Sony Alpha 200 with a Sony 18 to 70mm zoom. This camera uses the same mount as the Minolta Maxxum, so I was able to continue using my Tamron 28 to 70mm macro zoom and my Minolta 80 to 200mm zoom giving me a film equivalent range of 28 to 300mm plus macro over the three lenses. I, too, have a UV filter on each lens, as well as a polarizing filter. I live with the F-stop loss because I like to 'play' with the effects the polarizer offers. I will follow this up with a question to WCK. Have you used neutral density (ND) filters on your digital camera in the past, and, if so, what has been your experience? Did they work well, or do you find underexposing works more in your favour? |
|
Deleted
Deleted Member
Posts: 0
|
Post by Deleted on Nov 4, 2008 16:05:20 GMT -8
Thanks for starting this board im a bit of a "noob" new person at photography.
|
|
|
|
Post by Canucks on Nov 4, 2008 17:42:39 GMT -8
This is a great idea for a thread. First off thanks for the info regarding my question the other day, although you scared me out of getting and SLR  . A question about the haze now; when you say using filters is this in Photoshop or with the camera lenses, because I have a point and shoot. I have a big issue with haze/colour distortion (I'll post example later) and quite often when I use "Smart Fix" it removes the haze but the pictures becomes too contrasted, bright etc. Any input is appreciated. |
|
|
|
Post by Ferryman on Nov 4, 2008 21:04:53 GMT -8
When using an SLR, it's common to use a filter in front of the lens itself. For me, I have a UV Filter on both my 18-55mm lens, and 55-200mm lens. This filters out any excessive UV lighting which could potentially make the photo hazy, or ghostly. Then on the really sunny days, I use my Polarizing Filter over top of the UV filter. This is essentially like putting sunglasses on the lens to filter out the ecessive light, and bring out the colour.
I'm also too lazy to do any editing on the computer, and I also don't really believe in doing so. I like to post an image of a sighting that was true, and not doctored to look nicer than it really was. But there has been the odd occasion where I have doctored a photo I must admit, but I didn't feel good about doing so.
|
|
|
|
Post by WettCoast on Nov 4, 2008 23:11:01 GMT -8
I have never experimented with neutral density filters. Perhaps I should. Now to picture fixing: Have a look at these two shots of the Q Cumber, one 'as is' from the camera (except for the reduced resolution to 800 pixel width); the second one just slightly edited. 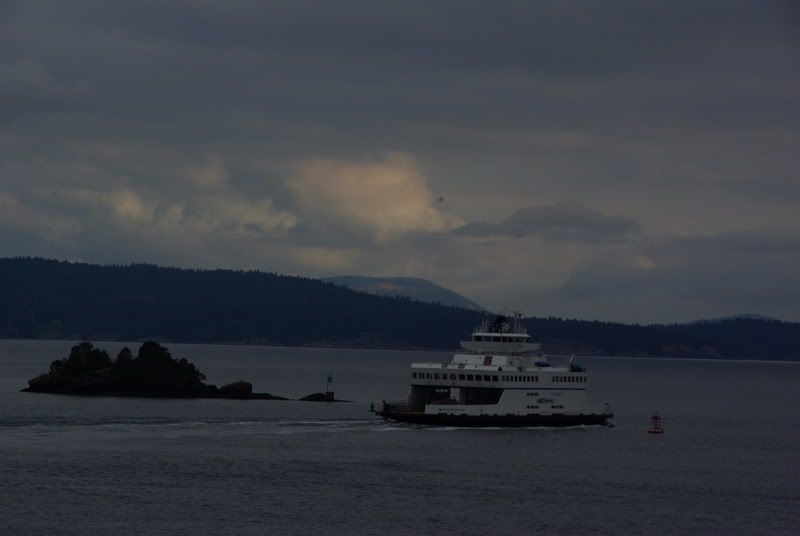 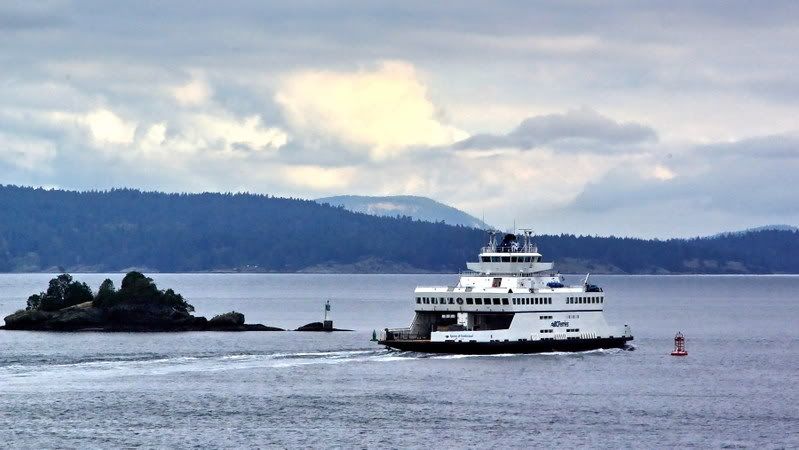 What have I done in the second photo: - The horizon has been straightened
- The photo has been modestly cropped to 9 x 16 aspect ratio
- Digital dust bunnies have been cloned away
- The picture has been lightened up and contrast adjusted
- I have lightened shadows a bit
- I sometimes also will use digital noise reduction and sharpening, and adjust the colour balance.
|
|
D'Elete BC in NJ
Voyager
Dispensing gallons of useless information daily...
Posts: 1,671
|
Post by D'Elete BC in NJ on Nov 5, 2008 7:38:23 GMT -8
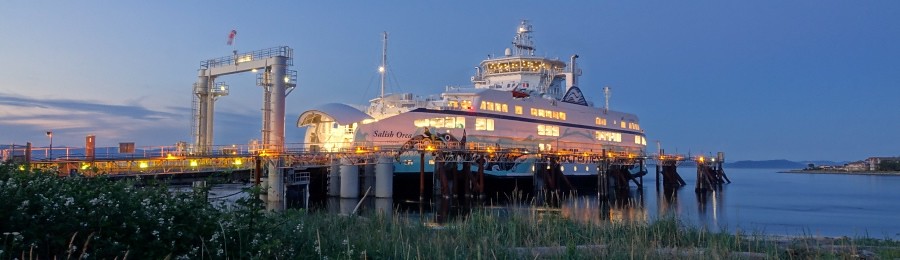
This is a great idea for a thread. First off thanks for the info regarding my question the other day, although you scared me out of getting and SLR . A question about the haze now; when you say using filters is this in Photoshop or with the camera lenses, because I have a point and shoot. I have a big issue with haze/colour distortion (I'll post example later) and quite often when I use "Smart Fix" it removes the haze but the pictures becomes too contrasted, bright etc. Any input is appreciated. Oopps...I didn't mean to scare you! A DSLR offers such a vast array of options, it can sometimes be a daunting task to truly understand all you can do. One of my friends is a pro, but conversations between us often end in both of us learning something new about taking photos. Photo-taking is just a hobby for me, but I have a very technical background with CCDs, and understand their shortcomings and advantages to a pretty high degree. If the thought of spending all those hard earned $$ on a DSLR is a bit scary, there are a lot of great prosumer level cameras out there. These cameras take great photos, give you the option of adding filtering and cost a lot less. Seeing as you are using a point and shoot (some point and shoots are threaded for filters, though most aren't), I found an article talking about a slip on universal filter holder. You might want to research this a little more thoroughly than my 2 seconds of googling. One trick for haze removal that I think both WCK and I employ is to reduce the very top of your brightness curve while simultaneously brightening your shadows by increasing the bottom of the curve.  Let's keep it simple for now and use the Windows Live Photo Gallery as you can do some quick adjustments to understand how it will affect your photo. Let's look at a particularly nasty work photo taken on my beat up point and shoot. ;D I chose this photo because it displays a lot of UV haze and is overexposed. If you open a photo with the fix command, and open the 'Adjust Exposure' tab  we can start playing.  With a little more editing in GIMP, I sharpened the image, and adjusted the brightness levels some more:  The changes made here are minor (and pretty rough since I'm doing this n my work computer  ), and much more significant improvements can be made with additional editing as WCK showed in his before and after photos above. This photo could have really benefited from a UV filter and a polarizing filter. The haze in the sky would have been significantly reduced and glare on the grass could have been virtually eliminated. When using an SLR, it's common to use a filter in front of the lens itself. For me, I have a UV Filter on both my 18-55mm lens, and 55-200mm lens. This filters out any excessive UV lighting which could potentially make the photo hazy, or ghostly. Then on the really sunny days, I use my Polarizing Filter over top of the UV filter. This is essentially like putting sunglasses on the lens to filter out the ecessive light, and bring out the colour. Okay, the effect you are using your polarizing filter for would be much better served by a neutral density filter. Your polarizing filter is much more versatile than that. It reduces (or increases) the amount of glare and reflection off reflective surfaces such as water, glass, or that hot layer of air right about the parking lot surface. I said I like to 'play' with my polarizing filter, and often use it to enhance a reflection off of a surface. You can see this in this photo:  I can understand a reluctance to alter what your camera 'sees', but often the camera doesn't capture the scene exactly as it was 'seen' by the people there. The wavelength range of the camera's sensor is much wider and has a different response curve than our eyes. This can alter the colour balance and the overall levels of a photo. Modest image manipulation is all about bringing a photo back into line with what you 'saw', possibly saving an otherwise drab photo. Look at WCK's example above...I have a feeling it was chosen as much to show the power of editing as well as to outline WCK's techniques. (lol...I hope I jumped to the correct conclusion there  ;D) |
|
D'Elete BC in NJ
Voyager
Dispensing gallons of useless information daily...
Posts: 1,671
|
Post by D'Elete BC in NJ on Nov 5, 2008 8:29:12 GMT -8
I have never experimented with neutral density filters. Perhaps I should. I'm interested in looking at graduated neutral density filters right now. Being able to stop down the sky while maintaining the brightness of the landscape is intriguing and, I think, harder to edit into a photo later than to do on the spot. I didn't think I would be able to use one effectively with my current set up because I was under the impression I would need to use a square filter and holder. But I just found out Tiffen makes a rotatable version which may work with my filter stack. I will need to address aperture issues I have on wide angle photos. Probably need to step the filter ring size up as I increase the stack depth. Another question: has anyone done any layering/masking of photos to enhance low light areas, etc? I have seen it done where you use multiple copies of part of the same photo stacked in layers to recover details. I have never mastered that, and if someone could point me in the right direction... |
|
D'Elete BC in NJ
Voyager
Dispensing gallons of useless information daily...
Posts: 1,671
|
Post by D'Elete BC in NJ on Nov 5, 2008 12:57:49 GMT -8
I was scrolling through Tiffen FAQs and came across this tidbit: Q: What filter would you recommend for 'general use'? I shoot mostly nature/scenic/travel photos and I live in Vancouver, BC. Is there one filter that should remain on the lens 'all the time'?
A:If you are going to keep the filter on at all times to protect the lens, we suggest you get the Tiffen UV Protector, which provides basic UV reduction as well. It will reduce the excess bluishness in images shot at high altitudes, of distant scenes, or when shooting over water. The Tiffen Skylight 1-A filter is also suitable for this purpose and many photographers leave it on the lens at all times. It absorbs almost half the UV and is pink-tinted to add a touch of warmth. It generally produces more pleasing skin tones when shooting outdoors in open shade or on overcast days. In short, either filter will suit your purpose and the choice really depends upon whether you want a touch of extra warmth or not. Of course, you can also get both filters and tailor your choice to your requirements and shooting conditions. |
|
|
|
Post by Canucks on Nov 5, 2008 14:27:15 GMT -8
Thanks for the info once again BC in NJ. I guess an SLR isn't so scary as it is expensive! I just dropped $400 on an S5 so it will be a while before I can afford an SLR.  Anyways my S5 is pretty good except for the blueish tinge and usually photoshop can remove it. Here is how I usually edit my photos. It isn't great but I find it helps sharpen and remove some of the blue tinge, plus it takes only a minute. I use Photoshop 6 or Corel X. 1. Crop to 800x600 or whatever size I need. 2. Run a smart fix. 3. Run unsharp mask at approx. 50%, 1.0 pixel, 0 threshold. 4. Possibly repeat unsharp mask if it still looks fuzzy. Here is the comparison Stock photo: 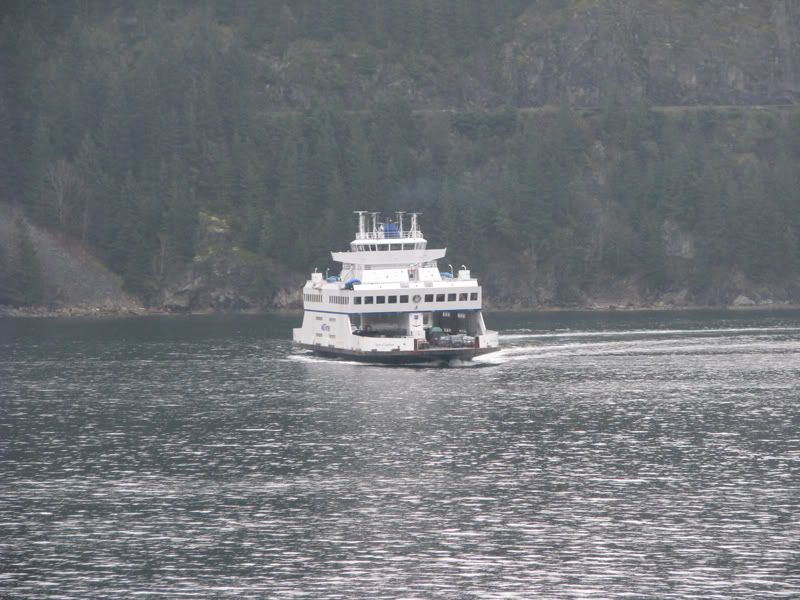 Edited Photo: 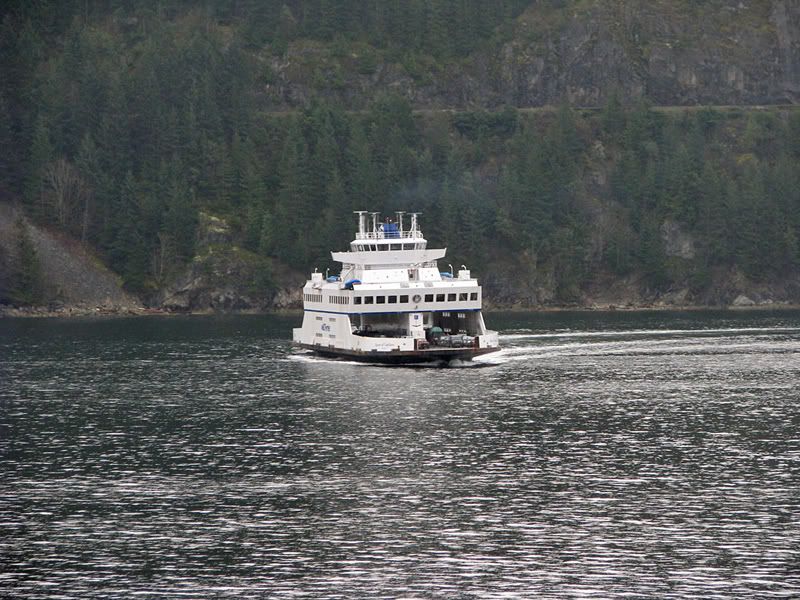 |
|
D'Elete BC in NJ
Voyager
Dispensing gallons of useless information daily...
Posts: 1,671
|
Post by D'Elete BC in NJ on Nov 6, 2008 6:33:57 GMT -8
Thanks for the info once again BC in NJ. I guess an SLR isn't so scary as it is expensive! I just dropped $400 on an S5 so it will be a while before I can afford an SLR. Anyways my S5 is pretty good except for the blueish tinge and usually photoshop can remove it. While Photoshop did do a good job of removing the blue tint, it can't remove the reflection on the water like a polarizer will. I did find an adapter for your camera which would allow you to mount filters. Canon LA-HDC20 lens adapter It is way cheaper if you have access to a US delivery location Canon LA-HDC20 lens adapter (US source)While Photoshop did do a good job of removing the blue tint, it can't remove the reflection on the water like a polarizer will. Here is how I usually edit my photos. It isn't great but I find it helps sharpen and remove some of the blue tinge, plus it takes only a minute. I use Photoshop 6 or Corel X. 1. Crop to 800x600 or whatever size I need. 2. Run a smart fix. 3. Run unsharp mask at approx. 50%, 1.0 pixel, 0 threshold. 4. Possibly repeat unsharp mask if it still looks fuzzy. Here is the comparison Stock photo: Edited Photo:  I took the liberty of 'tweaking' your image a little bit more. Most of what I did revolved around the colour and brightness curves; I removed most of the light haze by basically clipping the very top of the brightness curve. I then 'enhanced' the trees in the background by by increasing the green and blue channels in the region of the trees primary colours. Pushing the saturation up slightly intensified the adjusted colours. Then I did a couple of cute tricks; using the smudge/sharpen tool, I sharpened just the ferry. Then, also using the smudge/sharpen, I smudged the smoke stack exhaust to make it more evident and emphasize how hard the ship is working to power herself through the turn. Finally, I decided to crop the photo to emphasis the ship over the setting. Often I will make a few crops to see if I like how it alters the composition. This is my final cut, sampled up to 800x532:  |
|
|
|
Post by Northern Exploration on Nov 6, 2008 7:00:32 GMT -8
For anyone in the market for a camera the latest issue of Consumer Reports has a rating of various types of digital cameras from point and shoot to SLR types.
|
|
|
|
Post by Canucks on Nov 6, 2008 15:40:29 GMT -8
I see how curves can really help. Maybe you could start a photo enhancing program on the forum. |
|
CFG
Deckhand
 I used to be indecisive. Now I'm not sure.
Posts: 64
|
Post by CFG on Nov 6, 2008 22:17:59 GMT -8
For any 'amateurs' to the photo shopping world, Picasa 3 is a new google based photo management software that is really straight forward to use and seems to do a great job fixing up my point and shoot images. It's free to download and uses google's plain and simple well thought out train of thought.
|
|
D'Elete BC in NJ
Voyager
Dispensing gallons of useless information daily...
Posts: 1,671
|
Post by D'Elete BC in NJ on Nov 7, 2008 6:08:00 GMT -8
I see how curves can really help. Maybe you could start a photo enhancing program on the forum. Maybe a few of us could collaborate to build a set of tutorials, starting with basic image manipulation/correction and work our way towards more advanced Photoshop/GIMP fixes. I liked the results you got out of the software you are using; I found I got a better final image starting with your corrected photo than I did using GIMP's corrections on your original. Goes to show you (no matter how much I like GIMP ) that one particular software is not the end all, be all product! ;D If people are interested in doing some form of tutorial, let me know...we should probably get it all laid out and start a dedicated thread so it stays coherent and leave this thread for questions and suggestions. |
|
|
|
Post by Canucks on Nov 9, 2008 21:36:23 GMT -8
I've been doing some reading and found this trick on several sites to make your colours pop. 1. Open your image. 2. Go to Image>Mode>Lab Colour. 3. Hit Ctrl+M (Cmd+M for Mac), to bring up the curves. 4. Under channel scroll box select a. 5. Move the top and bottom points to about halfway across the first grid. The input should be about 85 and the output 127, for the top and same thing only negative for the bottom. You should end up with kind of a backwards Z. 6. Change the image back to RGB, Image>Mode>RGB. This is important or else you won't be able to save in JPEG. 7. I added a unsharp mask and put a small S into the curve on an adjustment layer, but you can do whatever you please. Hope this works for you, here are two examples showing the effect: 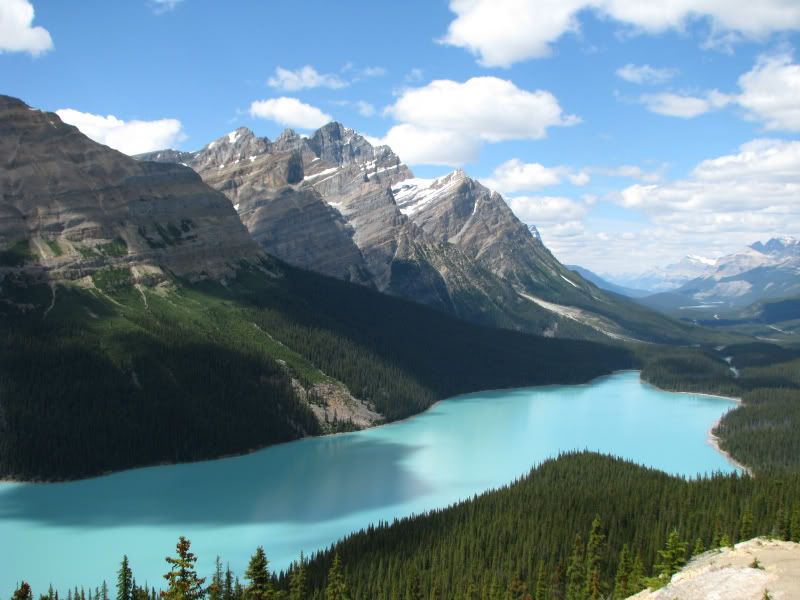 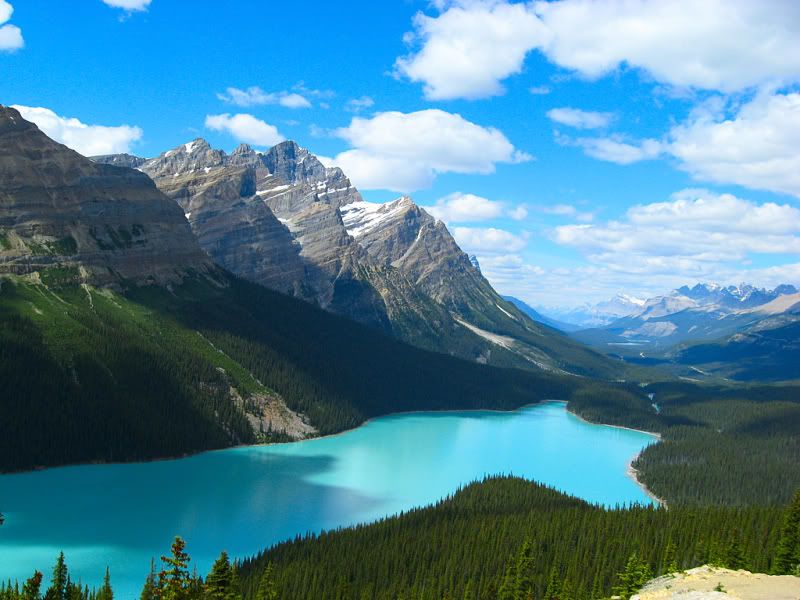 As you can see the sky and lake are emphasized greatly and create an exaggerated effect. I did this on purpose to show the effect but it could easily be toned down by raising the input numbers. 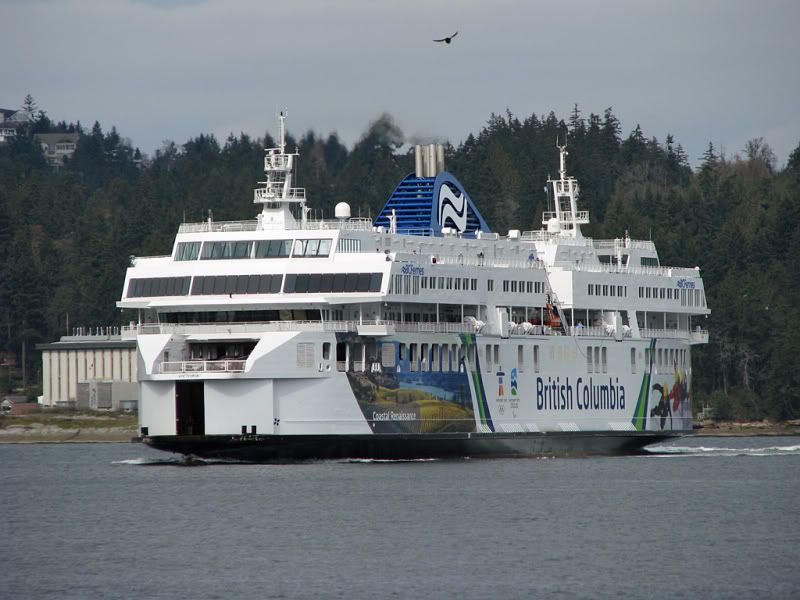 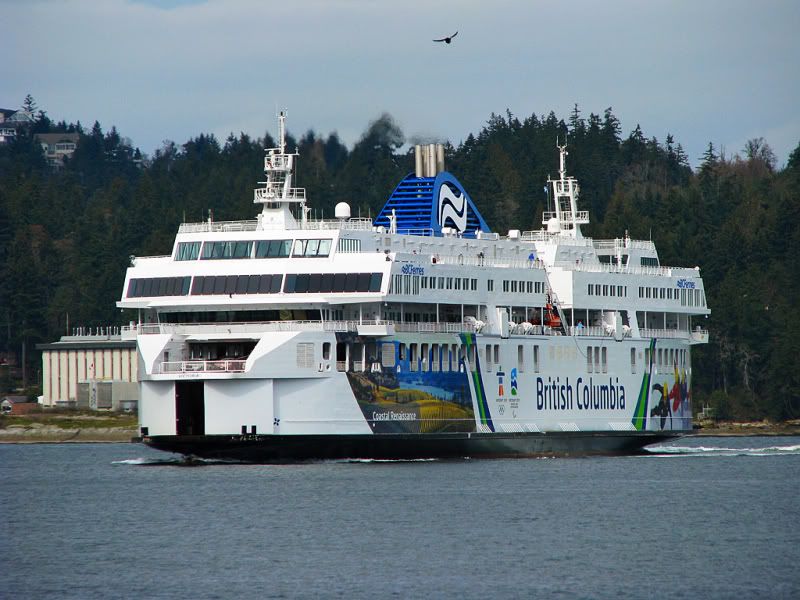 In this photo the colours on the ship are really brought out against the rest of the photo catching your eye. This effect is good to use on websites and such. Again the blue funnel and scenery stand out, also the ship appears to be whiter. |
|
D'Elete BC in NJ
Voyager
Dispensing gallons of useless information daily...
Posts: 1,671
|
Post by D'Elete BC in NJ on Nov 10, 2008 5:51:49 GMT -8
Canucks, Are you doing this in Photoshop, or Corel? Also, I was thinking of doing a series of photos stepping through the manipulations I'm doing with screen shots of the different tools used so people could see what changes were made and how it affected the overall photo. I did a trial run of just the photos to see approximately how many steps I typically do. Now comes the tedious part; rerunning the correction sequence, while pruning screen shots to show only the important info! |
|
|
|
Post by Curtis on Nov 30, 2008 22:51:25 GMT -8
This month's signature and avatar are some of my first experiments with getting the most out of a picture. However I'm not going into great detail, I'm just using the Auto Level on Paint.net right now. Compare the Unedited Picture... 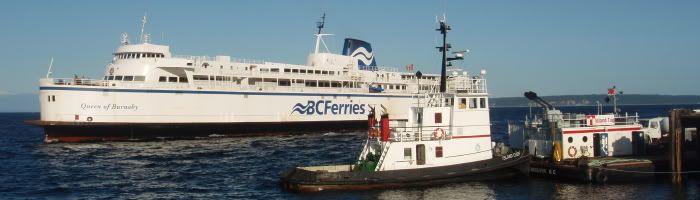 With the final product... 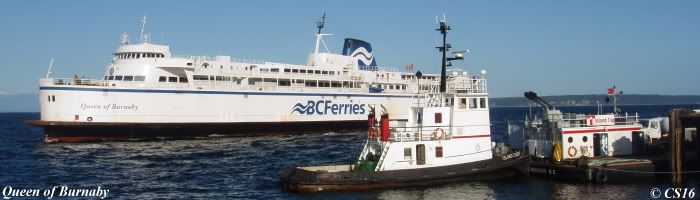 Though maybe that isn't the best example. So I turn you to these photos of the Queen of Vancouver. Which one is better? You be the judge. First the Unedited... 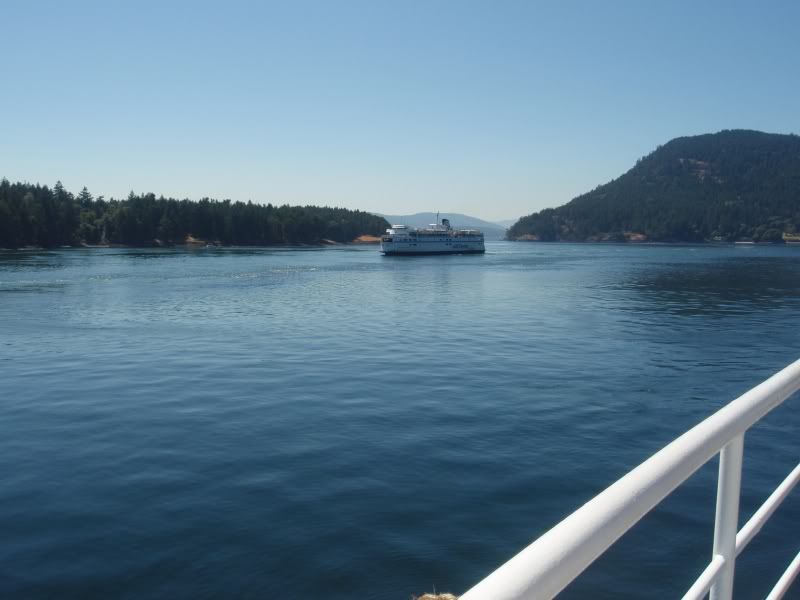 Than the Edited... 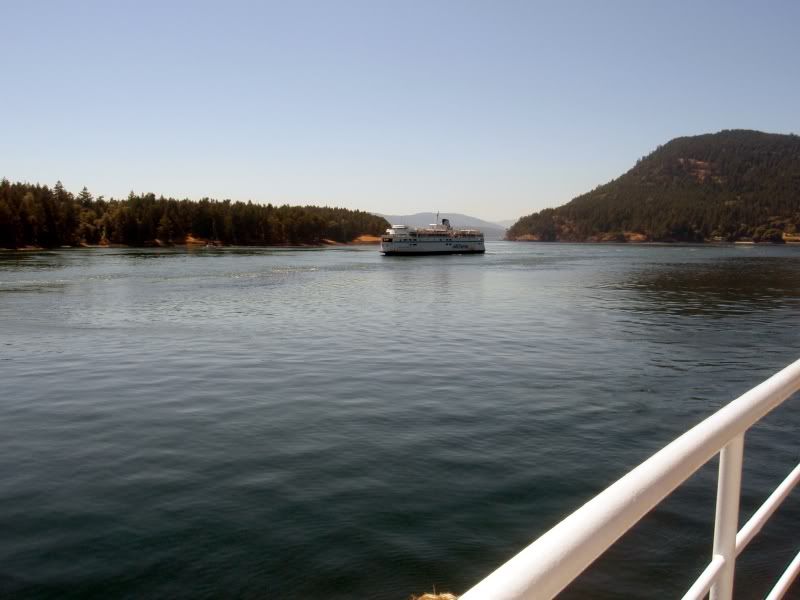 [EDIT] Okay, I've decided to change my sig to an Image that looks a bit more dynamic.  [/EDIT] |
|
D'Elete BC in NJ
Voyager
Dispensing gallons of useless information daily...
Posts: 1,671
|
Post by D'Elete BC in NJ on Dec 5, 2008 18:20:58 GMT -8
Wet Coast Kid introduced a stitching program developed at UBC called AutoStitch. Today I found an interesting program that adds some serious power to the original autostitch version WCK posted the link to: hugin.sourceforge.net/It uses the underlying modules of the UBC program, but also adds in high dynamic range capabilities...which I've just begun to explore...exposure correction, tone mapping, and several other features. Check it out.  *correcting to AutoStitch name |
|
|
|
Post by Canucks on Dec 5, 2008 22:52:32 GMT -8
I've experimented with HDR images too, but find they are a lot of work and they don't always turn out. The biggest issue is lining up the three exposures or else things get blurry.
|
|
|
|
Post by Low Light Mike on Jan 20, 2009 20:52:30 GMT -8
I have noticed that there are quite a few really nice photos in here, and I was wondering what kind of gear everyone is using. Any recommendations or items to avoid? Also does anyone have any good tips and tricks that they would like to share?
I'll start. I am using a Sony Alpha 100 DSLR with a couple of different lenses as my main camera. I have had it for almost three years now, and I feel that I am just getting the hang of it. I also keep a Panasonic DMX-FX33 (little point and shoot) in my pocket for those quick shots. I am starting to think about a possible upgrade (hence this post). |
|
|
|
Post by Mike C on Jan 20, 2009 21:14:14 GMT -8
I use currently a Canon PowerShot S3 IS. I'm also looking for an upgrade, and I was looking at the Sony Alpha series... seeing everyone here has a Nikon, I kind of want to be different How do you like that Sony MV LeConte? My S3 takes awesome photos for a point-and-shoot. It bears a 12x optical zoom for those far-away photos of ferries, and 6 megapixels so the photos come out decent. It also hosts a full-manual mode, which I love... dearly... and I highly recommend her, the SX10 or the S5 for the aspiring photographer who isn't quite ready for the full-on DSLR. a.img-dpreview.com/reviews/CanonS3IS/Images/allroundview.jpg |
|
Mill Bay
Voyager
Long Suffering Bosun
Posts: 2,886 
|
Post by Mill Bay on Jan 20, 2009 22:21:08 GMT -8
Personally, from what I've seen on your photobucket Leconte, you have no reasons at all to be seeking advice... your photos are among the best I've seen... all of them bright and full of vivid color. Whatever methods and equipment you're using, they are clearly very effective.
|
|
|
|
Post by Northern Exploration on Jan 21, 2009 7:30:15 GMT -8
I use currently a Canon PowerShot S3 IS. I'm also looking for an upgrade, and I was looking at the Sony Alpha series... seeing everyone here has a Nikon, I kind of want to be different How do you like that Sony MV LeConte? My S3 takes awesome photos for a point-and-shoot. It bears a 12x optical zoom for those far-away photos of ferries, and 6 megapixels so the photos come out decent. It also hosts a full-manual mode, which I love... dearly... and I highly recommend her, the SX10 or the S5 for the aspiring photographer who isn't quite ready for the full-on DSLR. a.img-dpreview.com/reviews/CanonS3IS/Images/allroundview.jpgThat camera has worked well for you given some of the great shots you have posted. My brother is far more of photographer than I and he has a DSLR that I haven't taken the time to figure out . |
|
D'Elete BC in NJ
Voyager
Dispensing gallons of useless information daily...
Posts: 1,671
|
Post by D'Elete BC in NJ on Jan 21, 2009 8:13:50 GMT -8
I use currently a Canon PowerShot S3 IS. I'm also looking for an upgrade, and I was looking at the Sony Alpha series... seeing everyone here has a Nikon, I kind of want to be different How do you like that Sony MV LeConte? My S3 takes awesome photos for a point-and-shoot. It bears a 12x optical zoom for those far-away photos of ferries, and 6 megapixels so the photos come out decent. It also hosts a full-manual mode, which I love... dearly... and I highly recommend her, the SX10 or the S5 for the aspiring photographer who isn't quite ready for the full-on DSLR. a.img-dpreview.com/reviews/CanonS3IS/Images/allroundview.jpgI'm using the Sony Alpha 200, which is really just an updated version of the 100. I chose the Sony both for its features and for the fact it was backwards compatible with my Minota Maxxum lenses, and flash (I don't believe the 100 would support my flash...different shoe). Very rugged camera...I know, I tested its mettle the first month I had it when it took a spill on to the steel deck of one of the Cape May ferries...other than a little scuff, there was no damage, though I recommend against my version of torture testing gear! ;D There are a few features I would like that it lacks, like live view and movie capability, but Sony does offer these on the 350. I have 18mm through 200mm lenses, which gives me 27 to 300mm equivalency, or ~0.5x through 6x magnification. A 400mm tele would up that to ~12x. |
|
Nick
Voyager
Chief Engineer - Queen of Richmond
Posts: 2,078
|
Post by Nick on Jan 21, 2009 9:01:27 GMT -8
I have a Canon Digital Rebel XT. It's not made anymore, but the Digital Rebel XSi is a much-updated version of it. I'm extremely happy with mine, as it's always done exactly what I want it to do. It has an 8MP sensor, and the 18-55 lens that it comes with is actually a pretty good lens. I also have a 70-300mm lens that's great for capturing those long-distance shots (the bluffs at Galiano, for example). The autofocus on my camera is amazingly fast, which is nice when you are scrambling to get that last minute shot. The near-instantaneous startup time helps with that too.
The only thing that I wish it had is some kind of vibration reduction. The current XSi has this ability, as well as live view, and a bunch of other cool doo-hickeys.
When I was shopping for this camera in early 2007, I also looked at the Nikon offerings (the D40x, I think). The only reason I went with the Canon was because I liked it's user interface better... as far as the cameras features and reliability are concerned, they're pretty even. The Sony wasn't really around yet, so I didn't even consider it.
|
|


 Very nice photos WCK. I like how they contrast well, the dark sky against the white ferry. What kind of camera/technique do you use?, your shots always seem to make the colour pop out.
 In the digital age, as it was back in the chemical age, editing and creativity can be done with the camera and/or in the 'dark room'. The dark room today is, of course, replaced by computer editing.

 . A question about the haze now; when you say using filters is this in Photoshop or with the camera lenses, because I have a point and shoot. I have a big issue with haze/colour distortion (I'll post example later) and quite often when I use "Smart Fix" it removes the haze but the pictures becomes too contrasted, bright etc. Any input is appreciated.
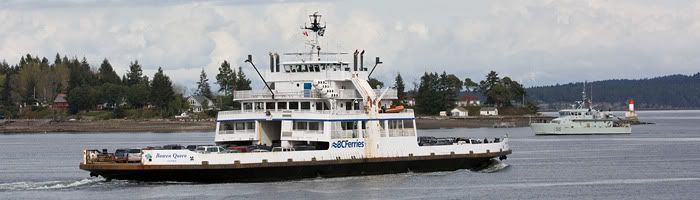

 ), and much more significant improvements can be made with additional editing as WCK showed in his before and after photos above. This photo could have really benefited from a UV filter and a polarizing filter. The haze in the sky would have been significantly reduced and glare on the grass could have been virtually eliminated.
 ;D)
;D) Anyways my S5 is pretty good except for the blueish tinge and usually photoshop can remove it.